Revision of Posts and Authors
As well just as collecting posts from social medias, Sentimonitor automatically detects the language and the tone (sentiment) of each post. For clients who have the add-on of topics and tags classification, it is also possible for tags to be added automatically each post.
Despite the efficient classification process, it may be necessary to manually revise and edit the tags made by Sentimonitor (to exclude spam, to add new tags etc.).
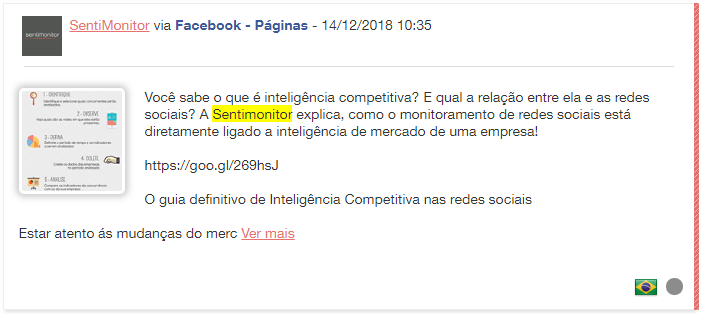
As standard, the posts shown are in a simplified form. This format shows just the relevant part of the text and information.
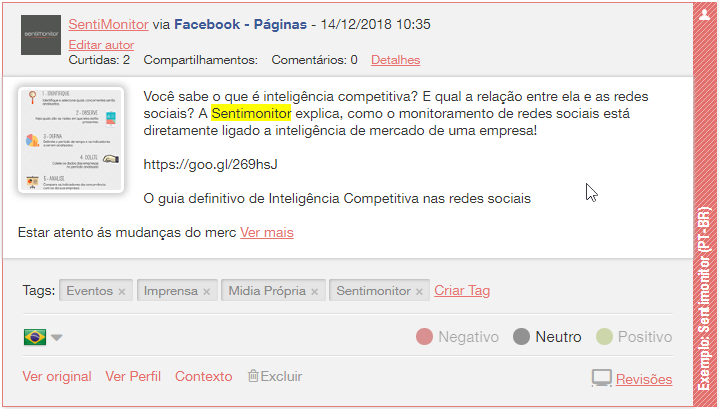
To revise a post, move the mouse over the text in question. The available options will appear to correct what you want to be shown, as well as further details about the post.
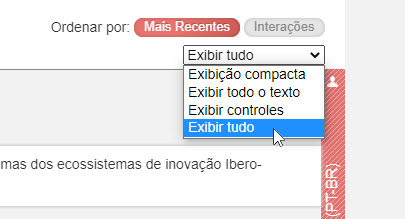
It is possible to show the options for all posts, without having to move the mouse by selecting Show all from the menu above the messages:
While your mouse is hovering over the post (or the Expand Posts option is active), it’s possible to consult or edit the following:
-
See original: A link which takes you into a new tab to see the original post on the social media it came from. For example, if it was a Tweet, this option would open Twitter and show you the original tweet. Note that, eventually, the posts may be deleted from the social media after Sentimonitor has collected them. In this case, it is common that the social media will show a “page not found” message.
-
See more: When posts are particularly long, Sentimonitor shows only the part of the post where the monitored term is displayed. To see the full version, click on See more.
-
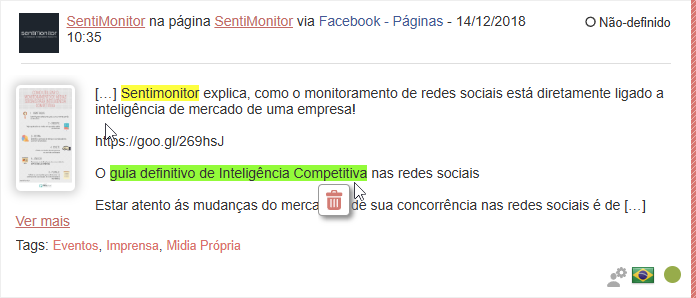
Highlighted Text: it is possible to highlight portions of posts to draw the reader’s attention. To highlight a text segment, select the desired text with the mouse, then click the Highlighter button:
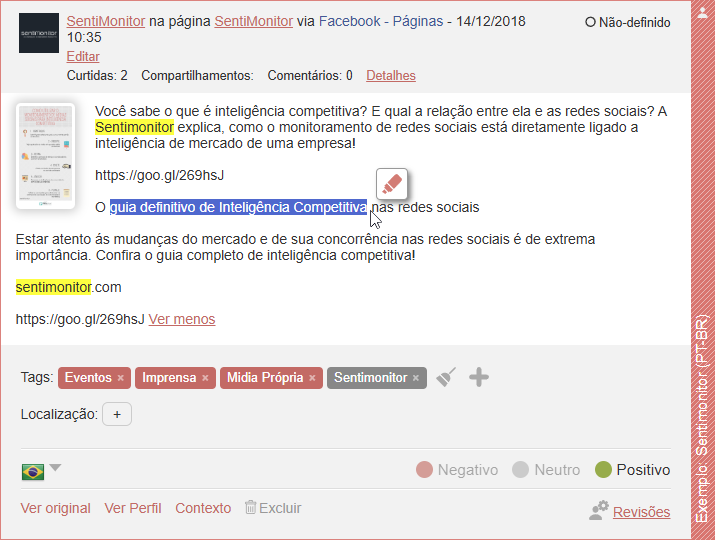
After clicking the Highlighter button, the text will appear with a green highlight. The highlight will be visible both on the platform and in your reports. Additionally, in very long texts, the first highlighted segment will be shown in the “Compact View” mode. You can remove a highlight by hovering the mouse over the highlighted portion and clicking the Trash icon.
-
Tags: Sentimonitor allows you to add tags to posts collected. The tags are markers that allow you to group messages according to their content. For example, when monitoring a brand, the user could use Tags to differentiate between the “Advertising” posts and the “Customer service” posts.

As standard, Sentimonitor doesn’t create any Tag automatically. Therefore, when revising a post, a Tag can be created by clicking Create Tag. Upon clicking this, the user must enter the name of the Tag they want to create.
After a tag has been created, it can be attributed to other posts by clicking on it. The highlighted tags in yellow are linked to the post, while the tags in grey aren’t.
Tip: a Tag can be hidden or deleted by clicking Manage, just below the tag filters on the left side of the screen.Tip: it is possible to automate the application of Tags to posts. For this, see Applying Tags.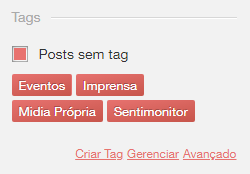
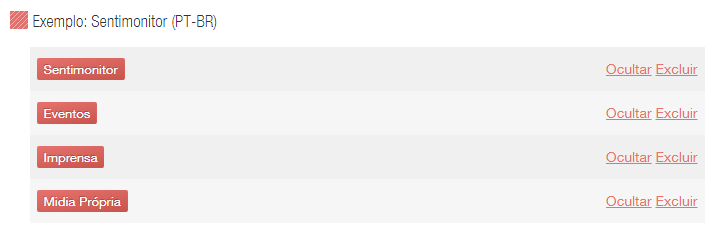
By hiding a Tag, it will no longer be shown on the filters area. Upon filtering, the posts classified with hidden Tags will be shown as though the option “Posts without Tag” were selected. The advanced Tag filters will continue to function in the same way, as if the tags were not hidden. On the results, the hidden Tag will only be shown on the posts which already have been classified by it (the Tag will not be shown for the classification of new posts).
The deletion of a Tag will only be possible if it wasn’t yet attributed to any posts. If there are posts with that Tag, an error message will show and it won’t be excluded. In this case, you will need to remove the tag from the posts before deleting it. We recommend using the Mass Classification/Revision tool to do this.
-
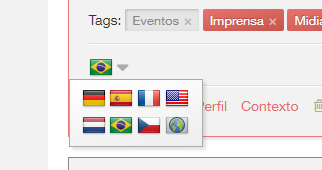
Language: the language in which the text of a post was written is shown by flags in the bottom left corner. To alter the language, click the flag icon and select the adequate language for the text.
-
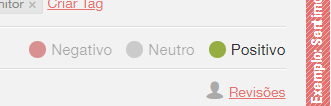
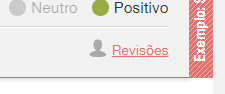
Sentiment: The sentiment of a post indicated whether it has a positive, negative, or neutral view of the topic monitored. When monitoring a brand, a recommendation of the brand would have a positive sentiment, whereas a recommendation of a competitor would be labelled as having a negative sentiment. To select the sentiment of a post, you just need to click on sentiment you want to label it as.
-
Delete: Allows the deletion of irrelevant posts. As a result, Sentimonitor will not collect irrelevant posts, even if they contain the terms being monitored. To delete a result, just click Delete. If you need to recover a deleted message, click on Deleted. Undo?.
Tip: Posts which have been deleted but are no longer visible can still be recovered. Go to the post filtering section and click on Advanced Filters. -
Mark as Revised: Eventually, the user can verify that all the options (tags, sentiment, language) are correct, and there is nothing more to modify. In this case, the user can click the icon
 to mark a post as revised. After doing this, the icon will change to
  .
. -
Edit Author: Allows the user to edit certain attributes about the Author, which will affect all the posts collected by that person. On clicking Edit Author, a new window will be shown:
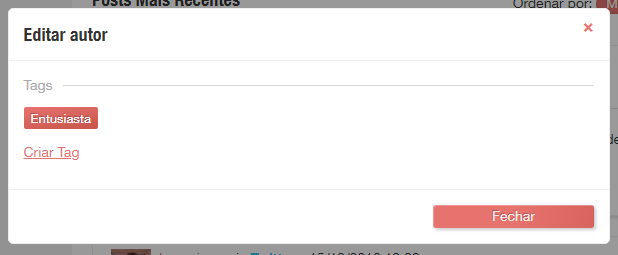
On editing an author, you can add or remove Tags. These Tags are independent of the Tags applied to posts, and affect the Author and all of their posts that were collected. The Tags applied to the Author are shown in yellow and those not applied are shown as grey. New Author Tags can be created by clicking Create Tag.
It is also possible to add Annotations to Authors. An annotation is a customisable text and title. The title can be up to 128 characters long, and needs to be unique to each Author. The text can be up to 1024 characters, and can contain any text or analysis. You can create new annotations on an Author by clicking Add Annotation, and it’s possible to edit existing annotations by clicking Edit or Delete. You can add an unlimited number of annotations to any Author.
Attention: the Author Annotations are only available to users with this function enabled on their account. If the options Add Annotation, Edit and Delete aren’t shown, contact the Sentimonitor team to find out about enabling this option.When a Revision is done, it will be annotated on the post, allowing for you to consult it afterwards. As a result, it is possible to verify which Sentimonitor users carried out which operations on each message. This can help with the revision of posts because various users can work on the same monitoring (view Working in Teams). To see the revisions on a post, simply click Revisions in the bottom right corner.
 Tip: it’s possible to filter the posts by user who did the revision, as well as verifying which posts weren’t revised. Go to the post filters, and select Advanced Filters.